Today I would like to continue with what I’ve done in my previous blog. Which is talking about each block of my first year at BUAS.
Before our year the idea of block B was simple: Turn the game you made in block A into a 3D game.
This means that normally the block requires you to learn about 3d graphics and physics. Now on top of that it also has to run on the raspberry pi, making you deal with both performance issues and cross platform development. That is a lot for you to deal with in your second block! But normally you would have the advantage of already having built the game, just in 2D.
However, there was an issue for my year, Bomberman’s gameplay would be identical in 3D and thats quite boring. I honestly thought that we would instead remake something close to Bomberman 64, which would solve the gameplay issue. But the teachers didn’t tell us what game we would be making, until the block started (even with my many attempts at asking). But they told us at the start that we would be making minecraft!
The problem with minecraft is that minecraft requires some bells and whistles to actually run. Its not a conventional game, in a sense that its an infinite procedural world, instead of the traditional hand made levels.
This means that on top of that whole list you would’ve already had to learn, you would also have to learn the ins and outs of minecraft and how to make it. On top of that high workload, we also got math classes (introduced in our year). Instead of having some homework assignments every friday, we would get a 30 minute exam and afterwards a 2,5 hour math lecture with a 5 min break. On top of that, the actual lessons weren’t very helpful, leading to a lot of studying and (mostly) praying outside of school hours. Thats not very pleasant on the friday morning, I will tell you that.
But not too worry (too much)! The friday lectures got a LOT of valuable feedback and surely will improve!
The Template
This block we were allowed to use our own templates. But we got Brian’s template for pi development. I did have some nice things to say about Jacco’s template, I don’t about Brian’s. I mean its nice that the cross-platform thing is set up, but thats about it. And I reckon you can easily create a nicer workflow yourself.
note: I reckon that the year after me will get a template from Dave (which I am very jealous of), since you guys wont be using the pi. And from what I’ve seen that template is actually quite nice!
Requirements
While the previous block had very nice scaling when it came to grading. This block did not. We had some basic features for each tier (think of stuff like player interaction, chunks, etc). And then we had to have a certain amount of points you got by adding optional features. The problem with that, is that instead of building on top of the systems you already made (like we did in block A). You instead had to create a bunch of loosely connected systems (for the most part).
Starting
The first thing I did was setting up the renderer and mesh generation. Making sure that any faces that weren’t visible, would not be rendered.
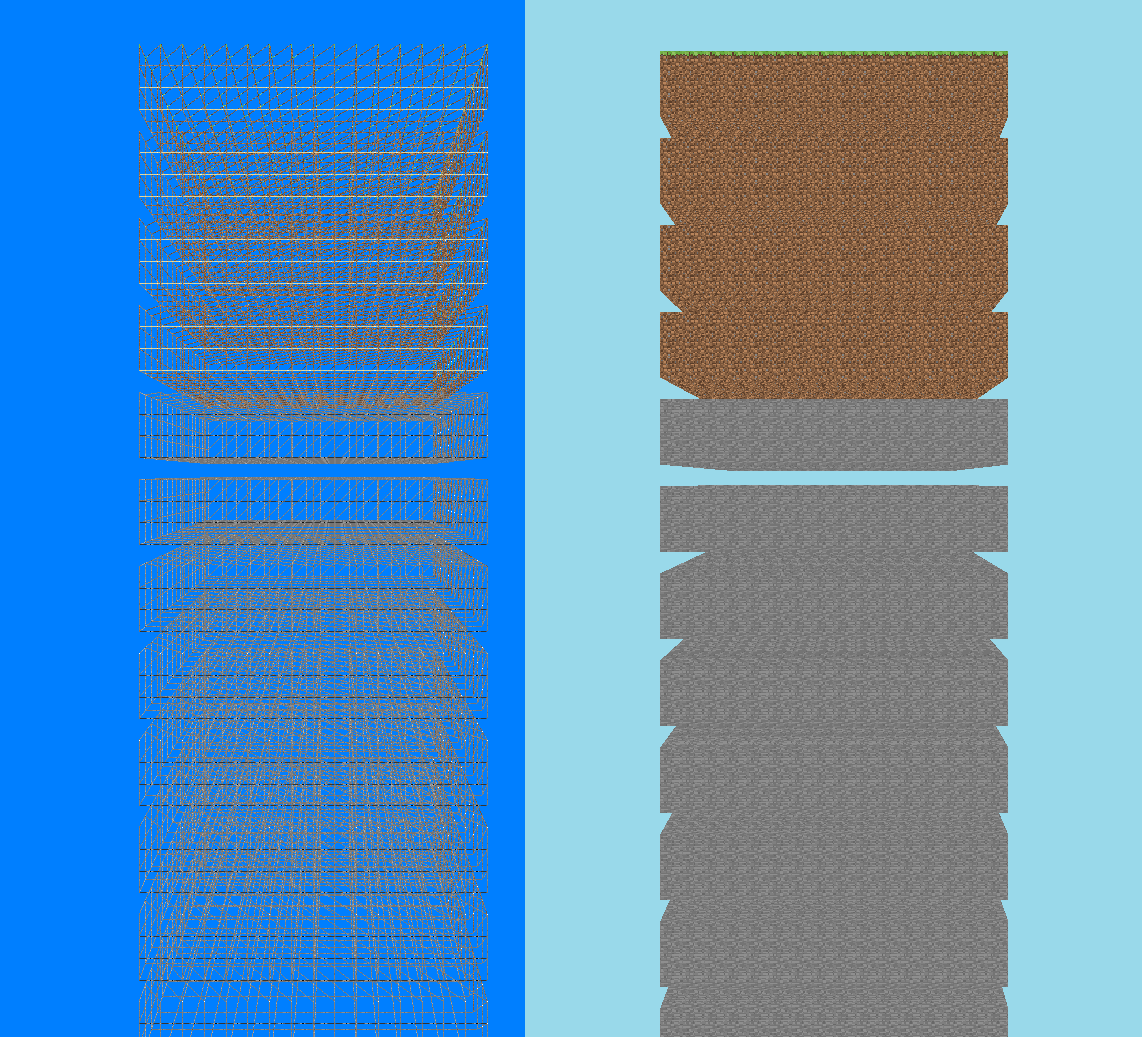
Continuing after that, I just worked on the world, making it infinite and doing procedural generation.
Worlds & Chunks.
World
c++
1struct World
2{
3	std::string name{ "world" };
4	std::vector<Chunk*> preGenerationChunkQueue;
5	std::vector<Chunk*> preMeshChunkQueue;
6	std::unordered_map <glm::vec2 , Chunk* > chunks;
7};
This was how I structured my world. First I store a name, which funnily enough is actually unused, but I think I was planning to add multiple dimensions, but never did. Second is the preGenerationChunkQueue and the preMeshChunkQueue. Once allocated a Chunk must have its terrain and mesh be generated. This happens on different threads and then get added to the the queue’s, once finished it gets the get placed in the unordered_map.
Chunk (& SubChunks)
Now one of the main goals for me was performance, I wanted my minecraft to run very fast. So one thing I did was to split my chunks into sub-chunks, you see there are 3 heavy operations that involve chunks:
- Generating terrain
- Generating it’s mesh
- Rendering it
Splitting up my chunk into sub-chunks means that I can generate a part of the chunk and already display it on-screen, whilst another sub-chunk is still meshing or generating (something I never implemented). Another thing is that when a block is mined, I only have to update its sub-chunk, instead of the entire chunk.
I also made my chunk size 32x128x32 (x, y, z), for the fact that it means that I can display more terrain with less draw-calls.
c++
 1struct LightUpdate
 2{
 3	const glm::ivec3 localPos = {31, 31, 31};
 4	Chunk* chunk = nullptr;
 5};
 6
 7struct LightRemoveUpdate
 8{
 9	const glm::ivec3 localPos = { 31, 31, 31 };
10	int value;
11	Chunk* chunk = nullptr;
12};
13
14enum LightUpdateType : int
15{
16	ADD = 0,
17	REMOVE = 1,
18};
19
20enum LightType : int
21{
22	SKY = 0,
23	BLOCK = 1,
24	ANY = 3,
25};
26
27
28struct SubChunk
29{
30	SubChunk()
31	{
32		memset(&blocks, (int) BlockType::AIR, sizeof(blocks));
33		memset(&lightData, 0, sizeof(lightData));
34	}
35
36	bool isReady = false;
37	int index{ 0 };
38	ChunkMesh mesh{};
39	int lightData[SUBCHUNK_LENGTH][CHUNK_HEIGHT][CHUNK_WIDTH];
40	BlockType blocks[SUBCHUNK_LENGTH][CHUNK_HEIGHT][CHUNK_WIDTH];
41
42	std::queue<LightUpdate> lightUpdatesQueue;
43	std::queue<LightUpdate> skyLightUpdateQueue;
44	std::queue<LightRemoveUpdate> lightRemoveUpdatesQueue;
45};
46
47struct Chunk
48{
49	int id = 0;
50	bool shouldRegenerate = false;
51	glm::ivec2 position;
52	bool isReady = false;
53	bool isGenerating = false;
54
55	World* parent{ nullptr };
56	SubChunk subChunks[SUBCHUNK_AMOUNT];
57
58};
Lighting
I must admit, that I do not wish to talk about lighting. To put it simply my lighting system was a frankenstein monster held together by hopes, prayers and duc-tape. But it was based on this blog series, which was really interesting! https://web.archive.org/web/20210117212430/https://www.seedofandromeda.com/blogs/29-fast-flood-fill-lighting-in-a-blocky-voxel-game-pt-1
Terrain generation
Whilst not as advanced as seen by some of my peers, I am still satisfied with the results. My chunks were generated in 3 steps: Terrain -> caves -> ore’s.
Terrain terrain generation
To determine the terrain, its all about determining the terrain height. To get this height I would combine 3 different noise maps
c++
1 float continent = terrainGenerator.continentNoise.GetNoise(sworldPos.x, worldPos.y);
2 float terrain = terrainGenerator.terrainNoise.GetNoise(worldPos.x, worldPos.y);
3 float detail = terrainGenerator.detailNoise.GetNoise(worldPos.x, worldPos.y);
4
5 BiomeType biome = GetBiome(worldPos, terrainGenerator);
6
7 float heightMultiplier = 0.0f;
8 float baseOffset = 0.0f;
Then I would apply some biome blending to make the transitions not as “harsh”.
c++
 1int biomeBlendAmount = 6;
 2for (int x=0; x< biomeBlendAmount; x++)
 3{
 4    for (int z=0; z< biomeBlendAmount; z++)
 5    {
 6        switch (biome) {
 7        case BIOME_MOUNTAINS:
 8            heightMultiplier += 1.5f;
 9            baseOffset += 0.5f;
10            break;
11        case BIOME_DESERT:
12            heightMultiplier += 0.5f;
13            baseOffset += 0.1f;
14            break;
15        //etc..
16        }
17    }
18}
19
20heightMultiplier /= (biomeBlendAmount * biomeBlendAmount);
21baseOffset /= (biomeBlendAmount * biomeBlendAmount);
With the Final height being:
c++
1float combinedNoise = (terrain * 0.7f + detail * 0.3f + baseOffset);
2float height = terrainGenerator.config.baseHeight + combinedNoise * terrainGenerator.config.heightVariation * heightMultiplier;
3
4return height;
What block kind of block a position should be gets determined based on its y position and its biome. Underground blocks turn into either bedrock or stone, surface blocks become either dirt, grass, sand or water based on their biome.
Cave generation
For caves I used a simple 3D noise with a threshold to determine the amount of caves.
c++
 1float worldX = x + chunk.position.x * CHUNK_WIDTH;
 2float worldZ = z + chunk.position.y * CHUNK_HEIGHT;
 3
 4float caveValue = terrainGenerator.caveNoise.GetNoise(worldX, worldY, worldZ);
 5
 6if (caveValue > terrainGenerator.config.caveThreshold)
 7{
 8    BlockType currentBlock = chunk.subChunks[sc].blocks[z][y][x];
 9    if (currentBlock == BlockType::STONE || currentBlock == BlockType::DIRT) {
10        chunk.subChunks[sc].blocks[z][y][x] = BlockType::AIR;
11    }
12}
Ore generation
The ore distribution is nothing special with me simply using some rng distribution and its Y level on which ore should be generated.
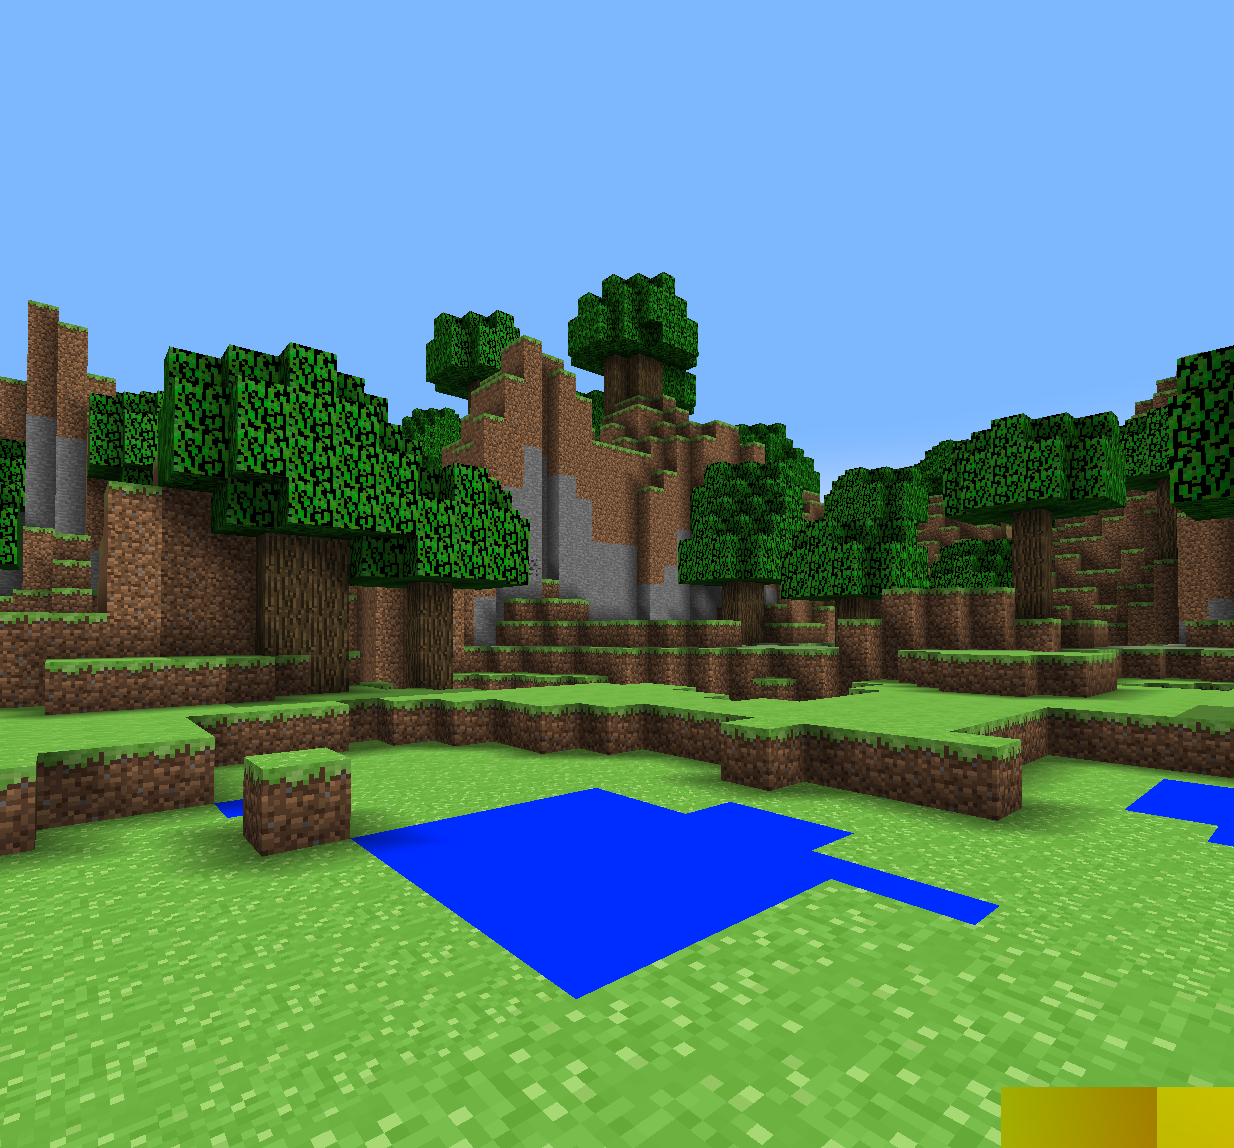 Image of one of the terrain generation results
Optimizations and Performance
As stated previously one of my goals were to have a very performant minecraft clone. So I pulled a couple of tricks to get some nice performance.
SubChunks & Multithreading
I already talked about this before, but the sub-chunks are mainly a cpu optimization since I can operate on a smaller part of the world than if I were to use entire chunks. I also made use of multithreading to avoid stutters and lag spikes. It allowed me to generate terrain, chunks and meshes in the background, whilst not freezing the game!
(very simple) Frustum culling
One of the things that greatly helped to improve the rendering performance was good ol’ frustum culling.
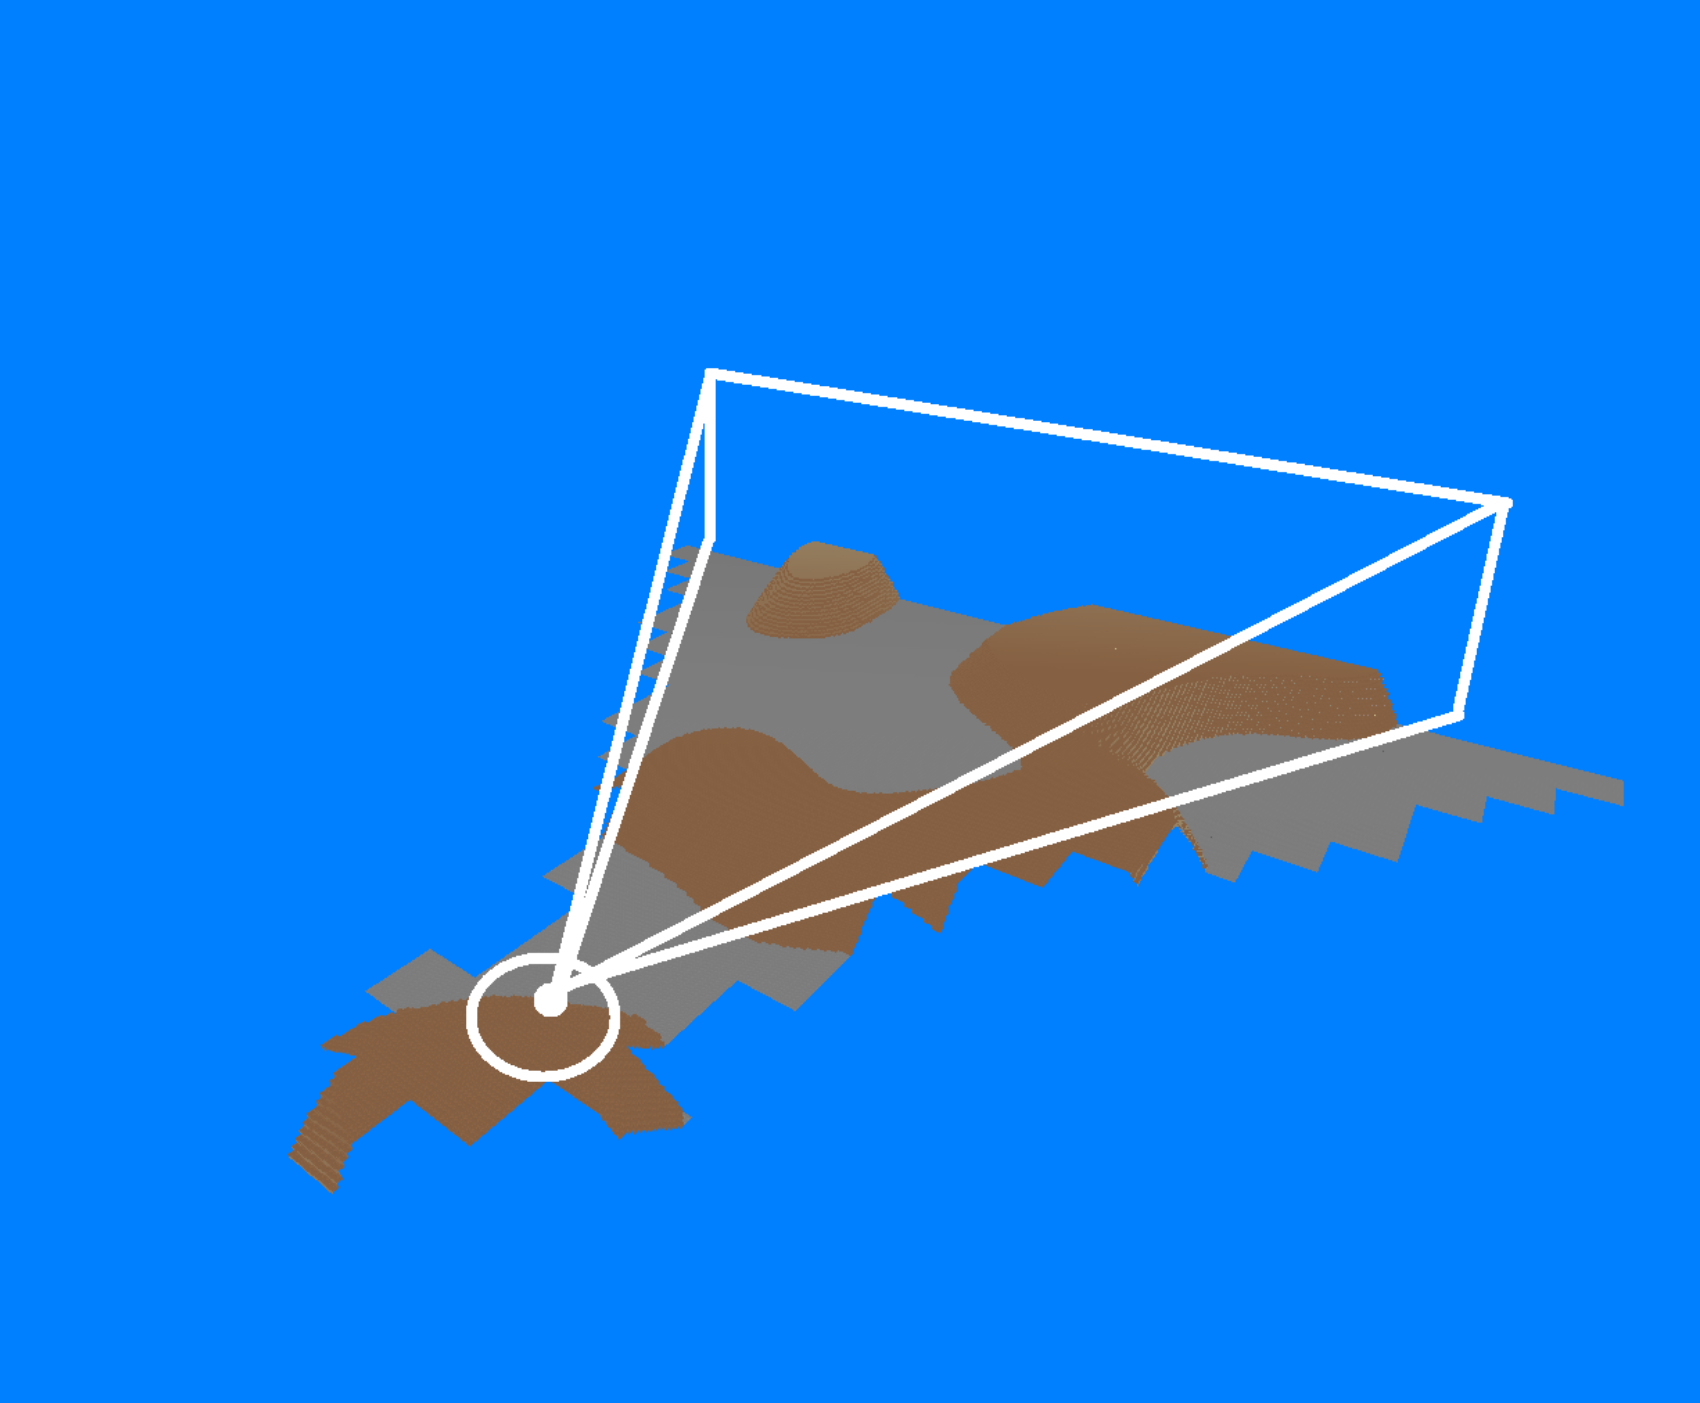 As seen here, only the chunks that are inside of the camera frustum get drawn
Compression
Modern pc’s and consoles have gigabytes of both CPU and GPU memory, the pi did not. I quickly noticed that the amount of memory being used by my chunks were a lot.
Take the original struct for 1 vertex.
c++
1struct ChunkVertex {
2    float x, y, z; // 3x4 bytes = 12 bytes
3    float normalX, normalY, normalZ; // 3x4 bytes = 12 bytes
4    float uvX, uvY; // another 8 bytes;
5    unsigned int lightLevel; // 4 bytes
6    unsigned int texIndex; // 4 bytes
7}
8//Total bytes: 40 bytes
That wastes quite some memory. For example, a light level goes from 0 - 15 which can be represented in 4 bits. Yet here we use 4 bytes which is 32 BITS, whilst we only need 4.
So I used this instead:
c++
 1union CompressedVertex {
 2	unsigned int  data;
 3	struct {
 4        unsigned int padding : 1;
 5        unsigned int shadow : 1;
 6        unsigned int normal : 3;
 7        unsigned int lightLevel : 4;
 8        unsigned int uvY : 1;
 9        unsigned int uvX : 1;
10        unsigned int texIndex : 6;
11        unsigned int z : 5;
12        unsigned int y : 5;
13        unsigned int x : 5;
14	};
15
16};Shadow, is just for the Ambient occlusion. Some corners have a little shade applied to them. This can be represented with 1 bit, because its either in shadow or not.
normal, now instead of encoding the individual xyz axis for a normal, we abuse the fact that a cube has 6 faces. Which means that the normal can only have 6 possible options, thus we use a number from 0-5 to tell which face orientation it is.
lightLevel, as said previous we only need a number from 0 - 15 which stores nicely into 4 bits.
UV, just like the normals the UV’s of a cube mesh are either 0 or 1, so we can get away with a single bit here for the X and 1 bit for the Y axis.
texIndex, we only need a number from 0 to 64 (or even less), so we use 6 bits for that.
x, y, z, like the normal and uv, we again abuse the fact that our positions in the chunk only go from 0 to 31, so we get away with a 5 bit number. I would like to note that this means that we can’t support stuff like doors and stairs because those have vertices that aren’t whole numbers.
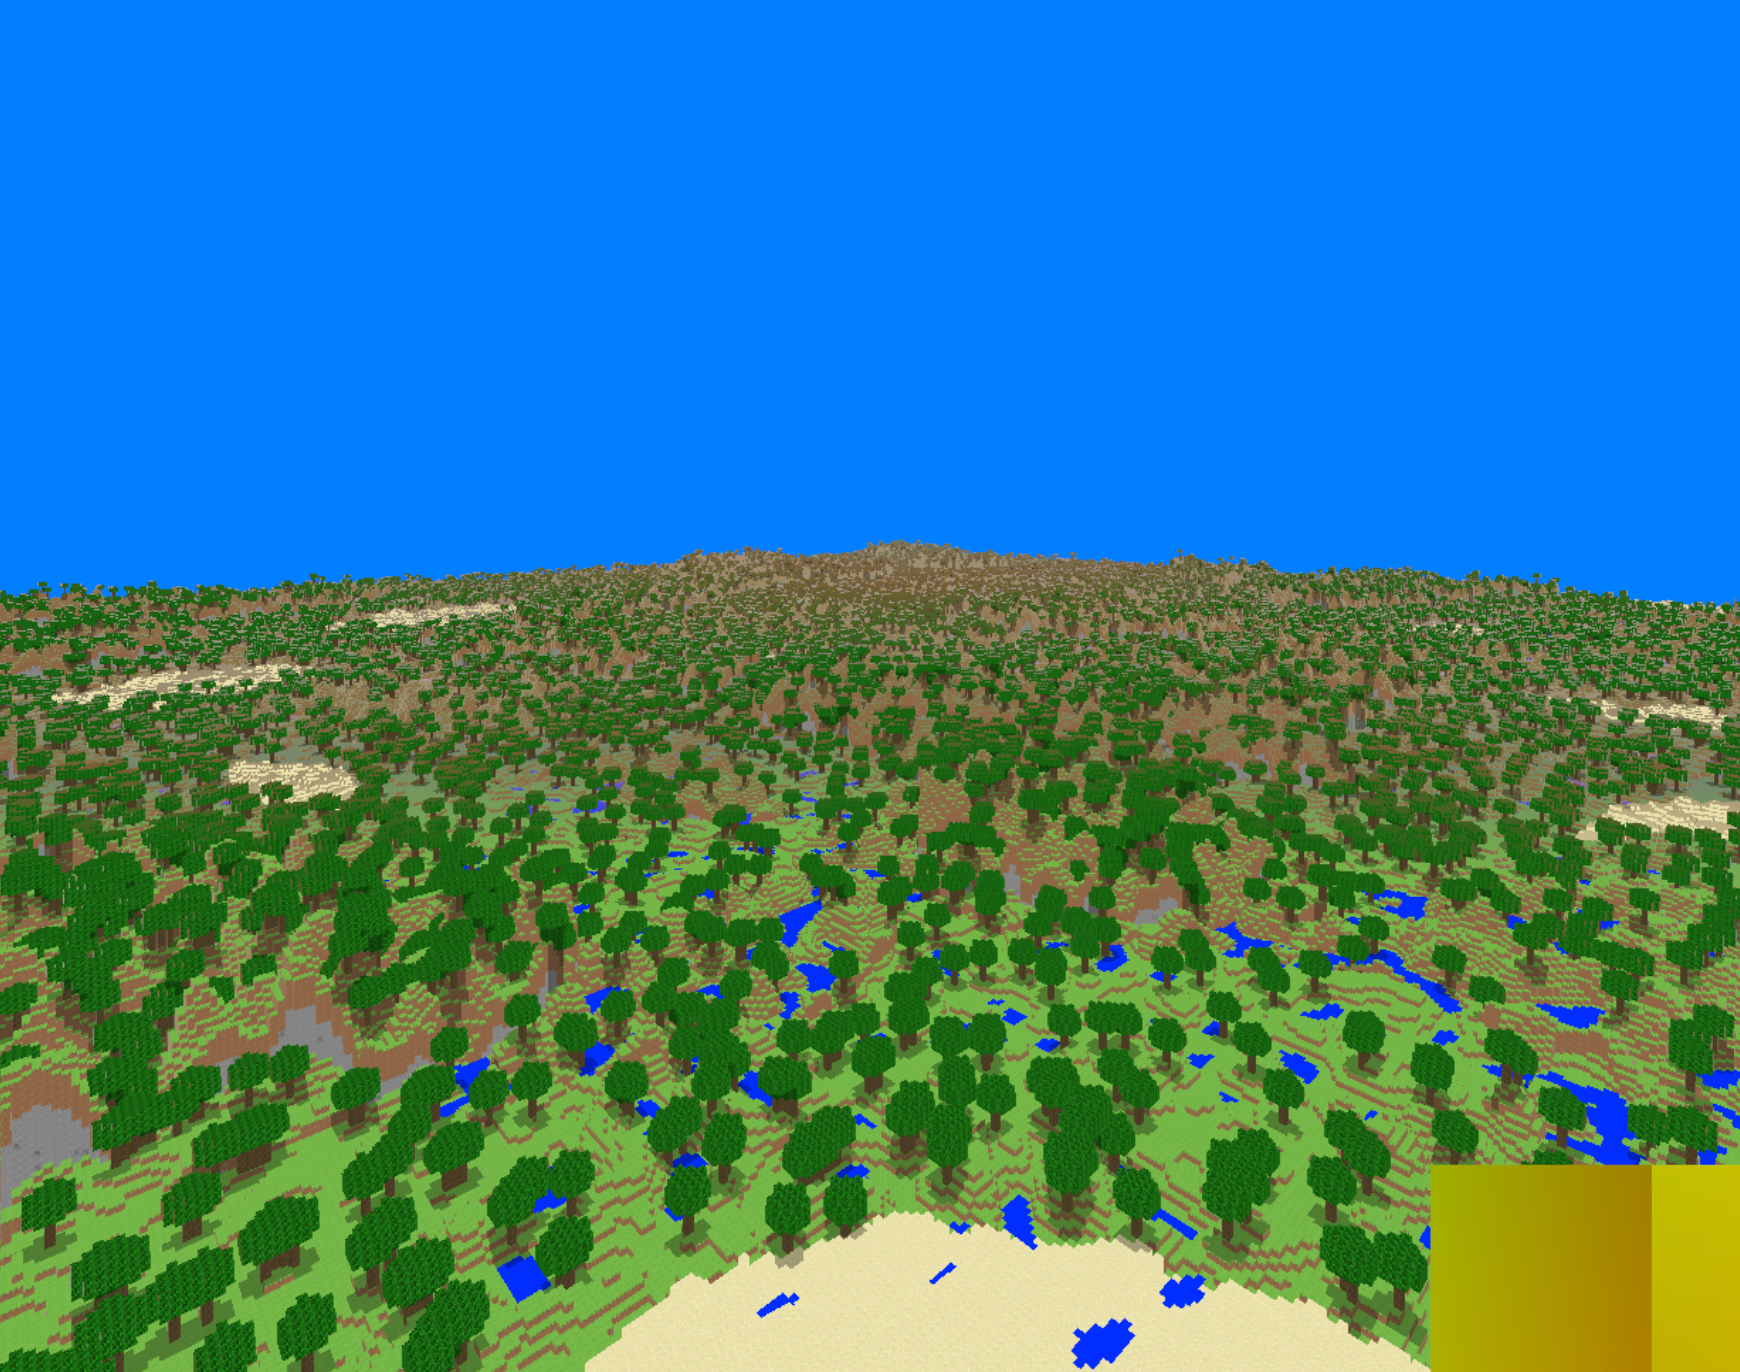
And voila! we just turned our vertex from 40 bytes to 4 bytes 🤯.
Which allows us to have higher render distances like this!
Command system
I’ve previously mentioned that we had to add features to get a certain amount of the points. We were allowed to suggest features, I suggested a command system and I’m very proud of the system I came up with.
Registering commands
To register a command you needed to provide a minimum of: a name + function pointer or lambda.
c++
1//Phoenix is the engine namespace.
2Phoenix::RegisterCommand("tp", teleportCommand)
3	.argument<Phoenix::IntegerArgument>()
4	.argument<Phoenix::IntegerArgument>()
5	.argument<Phoenix::IntegerArgument>();
Arguments
To inform the system of any arguments the user you can use the .argument
c++
 1class PlayerArgument : public Argument
 2{
 3public:
 4
 5	Player* getValue() const
 6	{
 7		return GetPlayerByName(this->strArgument);
 8	}
 9
10	const std::vector<std::string> GetOptions() override
11	{
12		return GetListOfPlayerNames();
13	};
14};
And then an example of a real command would be:
c++
 1void teleportCommand(std::vector<Phoenix::Argument*> args)
 2{
 3	if (args.size() != 3) throw Phoenix::CommandException{ "Not enough arguments" };
 4	int x = static_cast<Phoenix::IntegerArgument*>(args[0])->getValue();
 5	int y = static_cast<Phoenix::IntegerArgument*>(args[1])->getValue();
 6	int z = static_cast<Phoenix::IntegerArgument*>(args[2])->getValue();
 7
 8	auto view = registry.view<TransformComponent, PlayerComponent>();
 9	for (auto [entity, transform, player] : view.each())
10	{
11		transform.position = glm::vec3{ x, y, z };
12	}
13}
A bit of Reflection
If I were to redo this system in the modern day, I would probably use some reflection. So instead of the user having to manually register every argument, it would happen automatically.
Conclusion
Whilst at first I looked back somewhat negatively on block B, writing this has turned my perspective more nuanced. I don’t think its nearly as bas as I remember, instead it has a lot of care and passion put into it! It also taught me to prioritize features that I genuinely care about, instead of the ones that give me the highest grade.
Which is something you see back in the choices I made for block C. So tune in next when I talk about the best block! Block C!